

In Knowledgeworker Share, you provide all learning content to your users as posts. This article explains how to create a post and which basic settings you can define.
Create a new post
To create and publish a post, click "Click to create a new post ..." directly in the stream.

First, specify the post type. Five different post types are available. The type determines which settings and functions are available for the post and cannot be changed later, so choosing the correct type when creating the post is important. Find an overview of post types here.
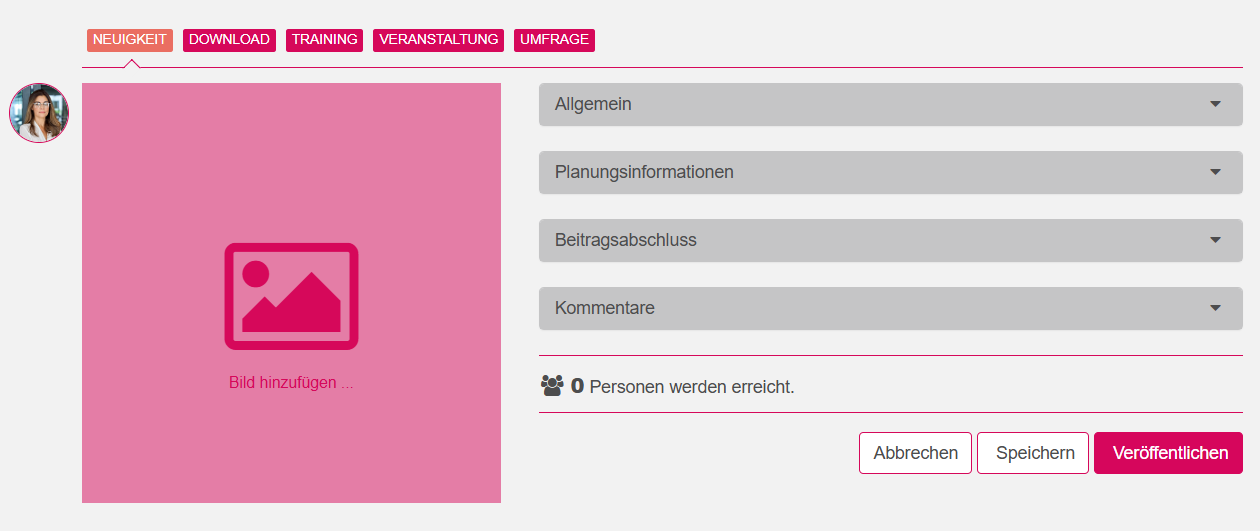
Next, define the post settings. You can also add, edit, or remove them later.
General
- Title: This required field is where you enter a post title. If training is uploaded to the post, its title is taken automatically from the course when the post is published. You can correct it later.
- Text: Add post text here, such as a table of contents or description of the training for learners. You can design and structure the text using advanced formatting, or add images and videos.
- Category: To enrol users in the post automatically through category-based assignment (matching), select the values from the available categories that define your target group. Leave this field empty when the post should not be assigned automatically through matching.
- Domain: If you have set up multiple domains in Knowledgeworker Share, you can select the domain to which the post is assigned. A post can be assigned to only one domain. This field is hidden if your system has only one domain.
- Attachment: Upload files here, for example e-learning content, PDF documents, or videos for download. This function is available only for the "Download" and "Training" post types.
- Post image: You can also upload an image and set it as the post image. If you do not select an image, a default image is used. For training content and links in the post text, available preview images are taken automatically as the post image. You can change post images later.

Planning information
- Enrolment period: Use the enrolment period to limit the period in which users can be enrolled in a post through matching or a curriculum. If you leave these fields empty, matching users are always enrolled in the post.
- Time zone: You can also adjust the time zone for the enrolment period when required.

Recurring
- Recurring completions are available only for the "Training" post type. Here, you can specify whether and at which interval a course should be repeated. Specify the interval and the period before the interval expires during which the course must be repeated.

Post completion
- Due in ... days: The due date is specified in whole days and defines the date by which the user should complete the post. This period begins individually for every user when they are enrolled in the post.
- Valid for ... days: The validity period defines the date until which the user can work on the post. This period begins individually for every user when they are enrolled in the post. The post can no longer be opened after its validity period ends.
- Mandatory: When "Mandatory" is enabled, the user must complete the content. The post is marked as mandatory in the stream. If it is part of a curriculum, it must be completed to complete the curriculum.
- Prioritize: When "Prioritize" is enabled, the post is pinned and always displayed at the top of the stream until it is completed.
- Certificate printing: For the "Training" and "Event" post types, you can have a certificate issued automatically to users when they complete the post. Learners can retrieve it in the stream and it can be sent by email.

Comments
In this section, you can enable and disable the comment function. If comments are generally allowed, you can also specify whether they can be made public to the entire target group. Otherwise, only the author, the relevant commenter, and users with special permissions can view the comment.

Publish post
Once you have defined the content and settings of your post, you can publish it so that it becomes visible to users. If you want to complete the post later, you can first save it as a draft and publish it later.

When you publish a new post, you can decide whether all newly enrolled and all future users should be notified that the post is available to them.

You can also define these and other detailed settings in advanced post editing.
Was this article helpful?
That’s Great!
Thank you for your feedback
Sorry! We couldn't be helpful
Thank you for your feedback
Feedback sent
We appreciate your effort and will try to fix the article